

What is the Protection Function or the Protect Range in Microsoft Excel?
The protect range function is a useful way to prevent other users of a workbook from altering data within a worksheet. By using this function, you can prevent the accidental or intentional modification or deletion of worksheets or cells within a worksheet. The protection function can further be enhanced by password protection. The use of a password allows you to strengthen the security of your workbook.
As the owner of the workbook, you can set the rules on what worksheets and cells are off limits for modification.
This can be a valuable function if you have created a workbook that you will be sharing with a third party and you want to ensure that they do not modify certain aspects of it. Without this feature used, you would have to manually check to see if they made modifications to the worksheet areas which you did not want modified. In this post I will demonstrate you how to use protect function in an Excel spreadsheet:
How to enable Protect Function in Microsoft Excel?
Practical Application of Protect function:
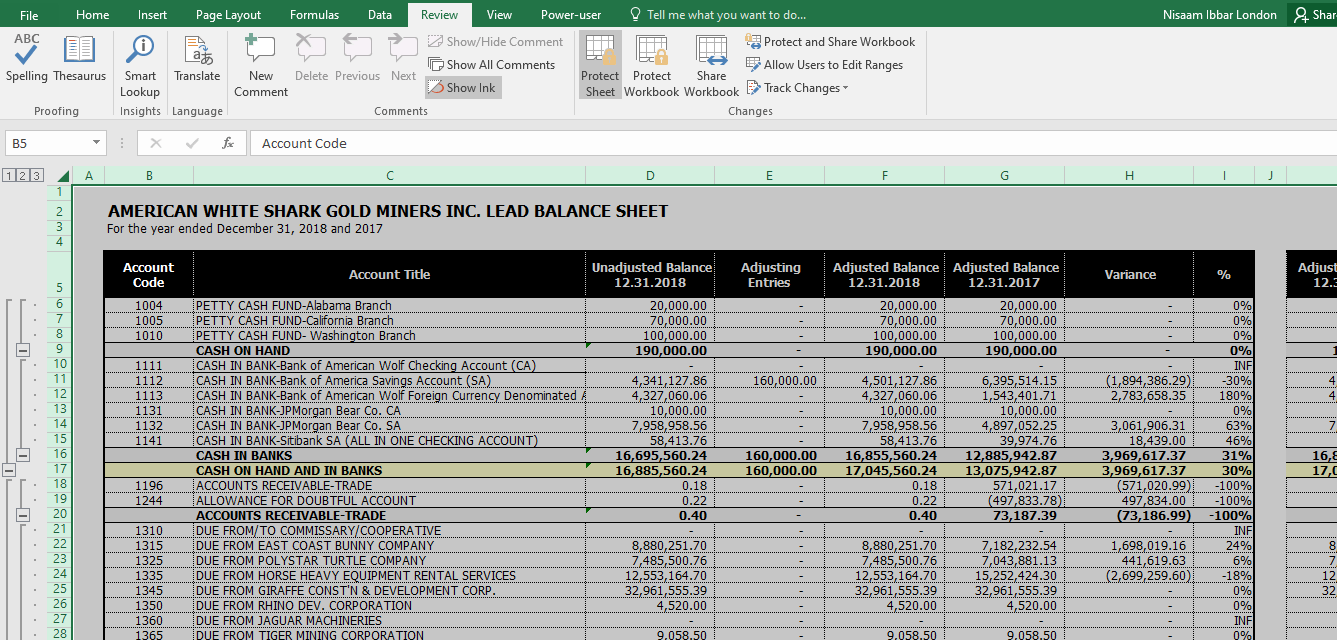
Steps to Enable Worksheet Protection: Step 1: In the Excel file, select the worksheet tab that you want to protect. Then go to the “Review” tab, and click “Protect Sheet”
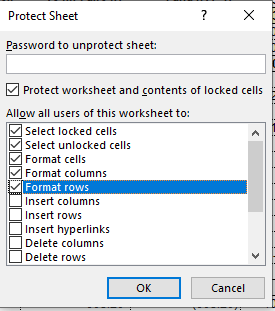
Step 2: A prompt message will appear showing elements you want people to be able to change along with the requirement to enter a password.

There are several options available here with respect to what you would like to protect in the worksheet.
For instance, you may want to protect the worksheet but still allow the user to be able to
- Select the cells of the worksheet to navigate it,
- Format the cells,
- Sort the data, and
- Use PivotTable and PivotChart features while not modifying the data itself
In that case, you would multi-select those features in the below list and click OK.

Step 3: After pressing OK, the worksheet will now be protected. If you try to modify a protected worksheet, the below message notification will appear.

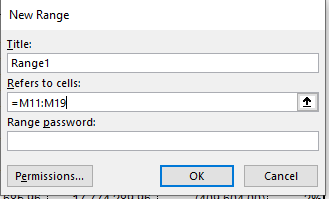
Step 4: You can also set range where you would like to allow someone to edit specific cells rather than the whole worksheet.
To do this, go to the “Review” tab, then click “Allow Edit Ranges” and click “New.” The below popup will appear. When this appears, you can give the editable range a title, and then in the “Refers to cells:” section, highlight the specific cells in the worksheet you would like to make editable.
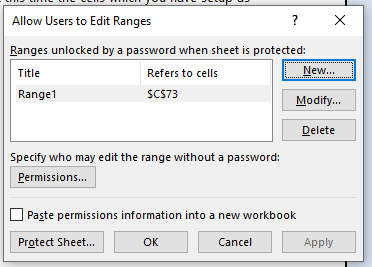
If you do not enter a password, anyone will be able to edit that range. Then, you can protect the whole sheet again but this time the cells which you have setup as being allowed to edit will remain editable.
Note that on this screen you can also set a “range password.” This will allow someone to edit the range but only if they have the password. i.e. when they click on the cell and try to edit it, they will be prompted to enter a password.
This can be useful if you want to send a workbook to multiple individuals, protect the whole sheet, but only allow certain individuals to edit a certain part of the workbook. In that instance, you would need to provide those specific individuals with the range password you created.
Note that you can create multiple rules for “Allow edit ranges.” Below is the first one that was setup but you can go back to the “Allow Edit Ranges” at any time and create another editable range or modify or delete an existing editable range.
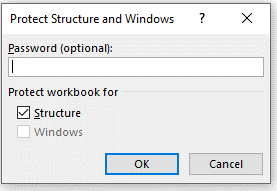
Step 5: You can also protect the entire workbook with a password instead of locking each individual tab.
I hope that helps. Please leave a comment below with any questions or suggestions. Thank you!


0 Comments